Fun and Games

How to Celebrate May Day
Bring in the flowers
Cut some branches from flowering shrubs like forsythia and dogwood or from ornamental fruit trees like crab apple. Put them in a pretty jug of water and enjoy a springtime treat.

Make a wreath
Cut a few spring flowers and some branches of greenery like juniper or yew. Attach to a straw wreath form with pins or glue. Hang on the front door.

Make a flower basket for a friend
Form a heavy sheet of paper into a cone shape and tape it securely. Attach a colourful loop of ribbon as a hanger. Fill the cone with spring flowers.

If you have a small wicker basket, fill it with flowers;

Make Your Own Pinhole Camera
Instructions provided by NASA Jet Propulsion Laboratory
Materials
• 2 pieces of white card stock
• Aluminum foil
• Tape
• Pin or paper clip
• Scissors
How to make it
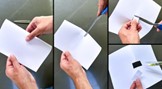 Cut a 1 to 2 inch square in the middle of one piece of card stock.
 Tape a piece of aluminum foil over the hole.
 Flip your paper foil side down and poke a tiny hole with the pin in the centre of the aluminum.
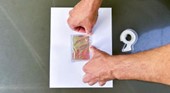
 Place your second piece of card stock on the ground and hold the piece with aluminum foil above it (foil facing up). Stand with the Sun behind you and view the projected image on the card stock below! The farther away you hold your camera, the bigger your projected image will be.
Bread and Butter Pickles
What you Need:
- A clean jar like a preserving jar or recycled jam or pickle jar.
- A pot to boil the vinegar and water
- A large funnel to use when pouring the liquid into the jar (unless you have a steady hand)
- White vinegar
- Water
- Cucumbers
- Salt
- Sugar
How to Make the Pickles
- Fill the jar two thirds full of white vinegar and one third of water
- Pour the vinegar and water into the saucepan and add about a tablespoon of salt and two tablespoons of sugar. The measurements don't need to be exact.
- Bring the mixture to a boil. Let cool slightly.
- Meanwhile, slice the cucumber into thin slices and pack into the jar. The slices can be as thick or thin as you would like the pickles to be.
- Carefully pour the vinegar mixture into the jar. There will be more than you need since the jar is now filled with cucumber slices.
- Put the lid on the jar. Let cool. Store in refrigerator. Enjoy.
Knock Down
The object of the game is to knock down an object like a bottle or can. Often these are milk bottles (remember those?) that are lined up in tiers on shelves. Here’s how to make your own Knock Down game.
You need:
- 6 clean empty cans of equal size with only the tops removed.
- Dry beans
- Strong tape
- A rubber ball
What to do:
- Fill the cans half full of dry beans
- Seal the can tightly on top with the tape.
- Balance the cans in three rows, 3 cans on the bottom row, 2 cans in the middle row and 1 can on top.
- If you wish you can paint and decorate the cans, but it’s not necessary.
How to play:
Decide how far away players must stand. Toss the ball and try to knock down some or all of the cans.
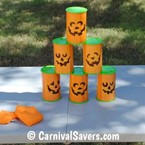
Ring Toss
The object of the game is to land a ring around an object like a bottle or can. Often these are milk bottles (remember those?) that are lined up in tiers on shelves. Here’s how to make your own Knock Down game.

You need:
- Five pumpkins of equal size that your ring can fit over
- One or more rings. Hula hoop rings work well. (In earlier times the hoop from the “Roll the Hoop” game could be used.)
How to play:
Line up the pumpkins in a straight line, a short distance between them.
Stand behind the agreed upon throwing line and toss the hoop. Try to “ring” a pumpkin.
Let’s Get Outside
Explore and Document
- Put on warm clothes and good boots. Take a notebook and pen. Also a camera if you have one.
- Go for a walk in your neighbourhood or just in your backyard.
- Look around you and observe what you see. Are there birds? Interesting shapes of snow on bushes? Any animals – squirrels, dogs, rabbits? How many different trees are there? What people did you see? Did anything in particular capture your attention and interest?
- Note all your observations in your notebook. Include a description. the date and the location. If you have a camera take a photo.
- Wait several weeks or a month and take the same walk again. Document how things have changed during that time. Do the trees look different? Are there new birds?
- After several months you will have an interesting record of the changing life of your neighbourhood.
- If you enjoy writing, write a story about your adventures and what you saw. If you like to draw and paint, create some art showing what you saw.
Make your own Jack=O=Lantern
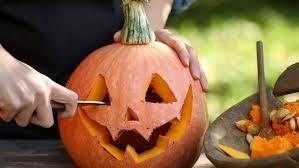
Several days before Hallowe’en carve a pumpkin for decoration. Make a scary face to represent “Stingy Jack”. Instead of a lighted coal use a tea light. Put your creation outside on a porch or balcony or use it for a table decoration. This is a family activity with children drawing the outline to be carved and scooping out the pumpkin insides. Parents do the carving.
Play a Game
Play a version of Pin the Tail on the Donkey. Cut a large black cat out of black construction paper. Also cut cat tails. Mount the cat on a piece of Styrofoam and hang on the wall. Each competitor is blindfolded and given a cat tail and a pin. See who can come closest to pinning the tail on the cat in the right location.

Make pumpkin seed treats

After scooping the insides from the pumpkin, separate the seeds and wash them to remove any pulp. Spread on paper towel to dry. When dry, toss the seeds in a bowl with a little oil, salt and chili powder. Spread on a cookie sheet and roast in an oven until brown and crisp.
Put in a bowl and enjoy.
Have a Candy Hunt
Instead of Trick or Treating hide little plastic bags of candy around the house. This is similar to an Easter Egg Hunt. Children can dress up in their Hallowe’en costumes and search for their treats.
Garlic Mustard Soup
Ingredients
- 25 g butter
- 4 wild leeks, finely chopped (or swap out with 1 onion)
- 175 g garlic mustard, finely chopped
- 3 ripe pears, cored and roughly chopped
- 1 ltr vegetable stock
- pinch salt & ground black pepper
- 200 ml double cream
- juice of 1/2 lemon
- Parmesan cheese (shaved to serve)
- olive oil (to drizzle)
- parsley (optional) (to garnish)
Instructions
- Melt the butter in a saucepan and cook the wild leeks for 10 minutes, or until soft. Add the finely chopped garlic mustard to the leeks with the pears and stock, and season with salt and pepper.
- Bring to the boil, cover, and simmer gently for 15 minutes. Remove from the heat and pour into a blender. Process until the soup has a very smooth texture.
- Stir in the cream and lemon juice, adjust the seasoning, and serve sprinkled with Parmesan shavings and drizzled with a little oil.
- To serve chilled, pour the soup into chilled bowls, top with crushed ice, and drizzle with a little olive oil. Garnish with parsley
Notes
The soup can be made up to 4 hours in advance and refrigerated until ready to use. It will keep in the freezer for up to 3 months.
Garlic Mustard Pesto
Ingredients
- 3 cups tightly packed, garlic mustard leaves (from rosettes)
- 1/4 tsp salt (or more to taste)
- 1 - 2 garlic cloves (or more to taste)
- 3/4 cup grated parmesan cheese
- 1 cup walnuts
- 1/2 cup extra-virgin olive oil (more or less to desired consistency)
Steps
- Place all the ingredients, except olive oil, in a food processor or blender. Process,scraping down sides as necessary
- Pour in olive oil, a bit at a time until desired consistency
- Adjust salt to taste
- Let it mellow for 3-4 hours; keeps well in fridge
Serving Ideas
- Serve as a dip with crackers or with grilled vegetables, such as eggplant, zucchini, or onions
- Toss to combine with your favorite shape of pasta
- Add to a sandwich
Cooking Garlic Mustard
Family Recipes
Ruth Taylor
Both sides of my family were from "Pennsylvania Dutch" stock. The recipes I've included reflect that heritage. Although I don't remember anyone making the apple butter, probably my grandmother would have as there was an abundance of apple trees on the family farm. The apples would have also been used in the mincemeat recipe. I know both my mother and at least one of my sisters made the mincemeat recipe. My sister says she would start with a chuck or blade roast and skim off any fat when cooled, and then put it through a grinder or food processor. She then used the broth for soup. I am impressed by the amount of work required to produce the finished product.
Mincemeat for Pie
| 4 lb. ground beef, cooked, twice as many apples. | |
| Add enough water to cover mixture. | |
| Add: 2 lb. corn syrup | 1 heaping tsp. nutmeg |
| 1 lb. currants | 1 rounded tsp. salt |
| 5 lb. brown sugar | 1 cup vinegar |
| 2 heaping tsp. cinnamon | |
| Cook 2 hours. | |
| Cook mincemeat pie for 10 minutes @ 450 F., then 25 minutes @ 350 F. | |
Originally mincemeat would have been canned. However we found it easier to freeze it in plastic containers.
Apple Butter
| 12 cups tart apples | 1 teaspoon cloves |
| 2 cups cider vinegar | 1/2 teaspoon allspice |
| Brown sugar | Grated rind and juice of 1 lemon |
| 2 teaspoons cinnamon |
Quarter and core apples. Cook slowly in the vinegar until soft. Press through a sieve. Measure, to each cup of pulp add 1/2 cup of brown sugar. Add spices, lemon juice and rind. Cook slowly until thick. Yield - 3 pints.
Bread Sauce
An old-fashioned alternative to gravy
If you’ve read the Anne of Green Gables books you may remember that Anne prepared a bread sauce one time. Apparently this was a common substitute for gravy in the early 1900s. Here is the recipe.
Ingredients:
2 Tbsp butter
1 cup stale bread crumbs
1 ½ cup milk
1 onion
1 bay leaf
6 cloves
Salt and pepper
Stud the onion all over with the cloves.
Melt 1 Tbsp butter in a skillet. When the butter begins to sizzle, stir in ½ cup of the breadcrumbs. Cook over medium heat until they are nicely browned. Set aside.
Put the onion with the cloves, the bay leaf and the milk in a small pot. Heat slowly until tiny bubbles form around the edges. Remove from heat before the milk boils. Let cool for 15 minutes.
Put the remaining ½ cup of breadcrumbs in a heavy sauce pan over medium heat and pour the scalded milk over them. Stir and simmer the mixture for about twenty minutes. Add remaining butter, salt and pepper. Keep the sauce warm until ready to serve.
Pour bread sauce over slices of roast turkey and sprinkle the browned breadcrumbs on top.
Makes about 2 cups.

I'm Bored!
Some quiet activities for the end of summer
By August many children are looking for new things to do. Getting ready for a return to school usually isn't one of them. Here are some suggestions.
Read a Story, Write a Story
Find a quiet spot to read a short story you haven't read before or one you read and liked. Then take a pad of paper and a pencil and write your own story. It often helps to do this outside where you can be inspired by what is around you - birds, animals, people, the weather (is a storm coming/), sound of a siren. Let your imagination run wild.
Draw What You See
You can do this anywhere; in your bedroom, in your backyard, on your balcony, in a park. You need a clean sheet of paper and a pencil. You can also use coloured pencils if you like. Look around you carefully and decide what you would like to draw. It could be a whole garden with lots of flowers or just one book sitting on your desk. Your drawing doesn't have to be a perfect photographic representation. Lots of famous artists added something in their painting that wasn't actually there or drew buildings that looked as if they were falling over.
Do An Experiment
There is a small world of living creatures in our gardens that we rarely see. How many different insects, caterpillars and beetles can you find? Pick a small area in your own garden or in a local park, look closely and you may be surprised at what you find. How many can you identify? This website may help you.
https://www.insectidentification.org/insects-by-state.asp?thisState=Ontario
Play a Game With a Friend
An old fashioned game that isn't played much anymore is hopscotch. You need a cement area like a driveway, some chalk and a flat stone or bean bag for each player. Draw a "court" using the pattern below. Be sure the squares are large enough for your foot to land there.

How to play:
Put a marker on square 1. Any square that has a marker must be jumped over. Squares that are side by side (eg. 2 and 3, 5 and 6. 8 and 9) can be landed on two feet at the same time unless one of them has a marker. Player 1 begins by jumping over square 1 and jumps to the end, turns around and jumps back stopping on squares 2 and 3 to pick up the marker. Player 1 finishes by jumping on square 1 which is now empty and then gives the marker to Player 2.. Player 2 throws the marker onto the next square. If at any time a player steps on a line or outside a square or misses when throwing the marker into the square, the player misses a turn. Landing the marker on a square becomes more difficult at the far end of the "court". The player who successfully reaches square 10 with the marker wins.
Think Gardening
April is too early to start planting in our historic gardens but we can get started by planting seeds in trays and small pots and setting them on the window ledges in the classroom. This is a great activity for children.
What you need:
- A package of sunflower seeds
- Small paper or Styrofoam cups
- Potting soil
- Pencil
- Water
- A sunny spot on a window sill or table near a window
What to do:
- Fill the paper cup with potting soil.
- Using the eraser end of the pencil. poke a hole as deep as the first knuckle of your little finger. You can also just use your little finger to poke the hole.
- Drop one sunflower seed in the hole.
- Cover the seed with soil and press lightly.
- Water just enough to dampen but not soak the soil.
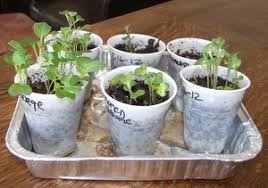
- Place your seed cups in a bright location and water only when the soil starts to dry out.
- After several weeks your plants should be a few centimeters tall and big enough to plant in the garden.
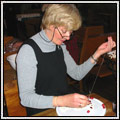
Make a Drum Ornament
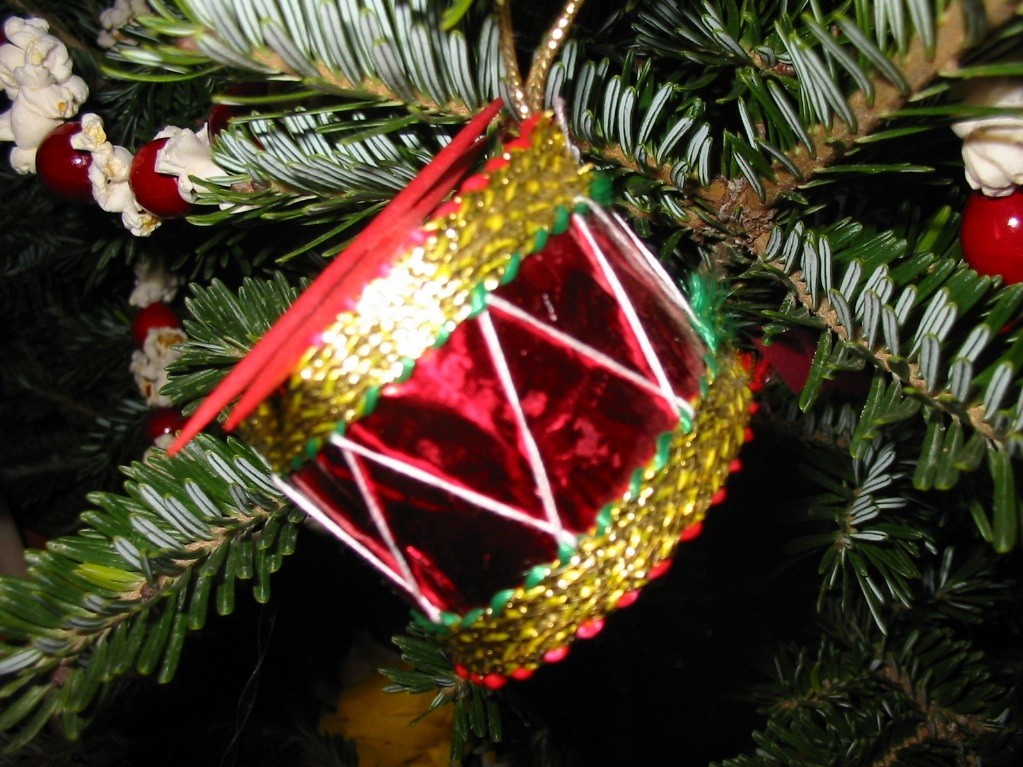
It's easy to make the Little Drummer Boy a drum to hang on the tree. Here's what you'll need.
Materials:
- A cardboard tube from a roll of toilet paper or paper towel.
- Coloured foil paper or regular kitchen foil
- Narrow ribbon
- Thin cord
- Glue
- Scissors
- Knife
Directions:
Cut a piece from the end of the cardboard tube so you have a smaller tube in the shape of a drum.
Cover the drum completely with foil. Put a little glue on the cardboard to hold the foil in place.
Glue the cord in a "V" pattern around the side of the drum. (See photo)
Glue ribbon around the top and bottom edges of the drum to hide where the cord is attached.
Glue a loop of cord or ribbon to the top edge of the drum.
Hang on the tree.
How to Press Leaves
The easiest way to preserve leaves is to press them between two layers of wax paper.
- Choose leaves that are flat and fairly thin.
- Lay the leaves on a sheet of wax paper and place another sheet of wax paper on top.
- Place a heavy object like a pile of books on top of the leaves.
- Leave for a week or more for the leaves to dry out.
Decorate a pot and fill it with a plant for Mothers' Day
Mothers love to receive something you have made for them. They appreciate the extra effort and love that goes with the time spent creating something special, no matter how small or simple. Handmade gifts were often the only ones available in small rural Victorian communities with little access to stores. Here are the directions for an easy springtime gift that should please any mother.
You will need:
- 1 or more terracotta pots
- Acrylic paint in your choice of colours
- Paint brush
- Plastic sheet or garbage bag to protect work surface
- Potting soil
- Coffee filter
- Plants to put in the finished pots
Directions:
Create a design on the terracotta pot with the acrylic paint. Let paint dry. Place a coffee filter in the bottom of the pot to keep the soil from falling through the hole in the bottom of the pot. Add potting soil and the plant. Water if necessary.

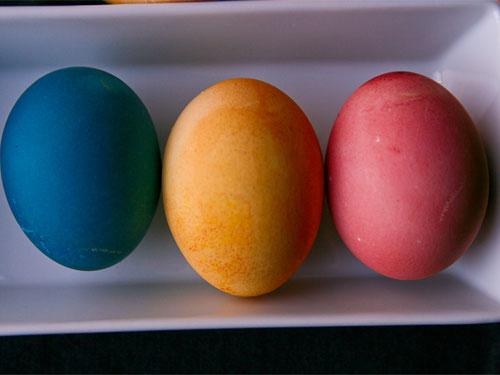
Victorian Easter Eggs
Eggs have been a symbol of rebirth for thousands of years, long before they were a part of Easter tradition. They were decorated and given as gifts at springtime festivals in many cultures. Some were elaborately covered in gold and jewels.
Children in Victorian times enjoyed Easter egg hunts and egg rolls. These were competitions to see who could find the most eggs or roll an egg farthest down a hill. They also liked to colour eggs. Unlike the commercial dye kits available today, they used natural homemade dyes. You can easily do the same. Here is how.
Make natural dyes
Red dye: Chop up 2 beets. Put in a saucepan with 1 quart pf water, 1 Tbsp. of vinegar and 1 Tbsp. of salt. Boil for 30 minutes. Cool. Drain liquid into a bowl.
Yellow dye: To 1 quart of water in a saucepan add 1 Tbsp. of vinegar, 1 Tbsp. of salt and 6 tbsp. of ground turmeric. Boil until turmeric is dissolved. Cool. Pour liquid into a bowl.
Blue dye: Shred one large purple cabbage. Add cabbage to 1 quart of water, 1 Tbsp. of vinegar and 1 Tbsp. of salt. Boil for 30 minutes. Cool. Drain liquid into a bowl.
Boil a dozen eggs: Hard boil the eggs. Let cool.
Dye the eggs
You need:
- Rubber cloves to protect hands from dye
- Plastic sheet or garbage bag to protect counter or table
- Tongs to hold eggs while dipping (optional, you can use your fingers)
- Bowls of dye you’ve made – red, yellow and blue
Plastic wrap covered cookie sheet, tray or large platter
Method:
- Using the tongs or your fingers put a hardboiled egg in one of the bowls of dye
- Leave submerged until the eggshell is coloured to the intensity you want
- Remove from dye bowl and place on the tray to dry
- NOTE 1: Blue dye takes much longer to colour the shell; you will need to leave eggs in the blue dye for a couple of hours
- NOTE 2: You can make green dye by mixing the blue and yellow, a violet dye by mixing red and blue, and an orange dye by mixing red and yellow
Victorian Fan Ornament
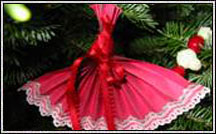 Trimming the Christmas tree was an exciting event in Queen Victoria�s time. Everyone wanted to follow a tradition started by the Queen whose husband Prince Albert brought from Germany the idea of an evergreen tree decorated for Christmas. Families who could afford them could buy beautiful glass ornaments made in Europe, but even wealthy families made their own. Children would string popcorn and berries, make paper chains, and use all kinds of natural materials like pine cones and birch bark to create tree decorations. Here is an easy ornament that you can create for your tree.
Materials Needed:
- Sheet of coloured paper
- 30 cm (12 inch) piece of narrow lace trim or ribbon
- String or cord
- Glue
- Scissors
- One hole punch
- Cut a piece of paper 30 cm (12 in) by 10 cm (4 in)
- Cut a piece of lace or ribbon 30 cm (12 in) long
- Glue the lace or ribbon along the bottom edge of the paper.
- Starting with the short side of the paper, make a 3 cm (1 in) fold
- Turn the paper over and make another fold the same size.
- Continue this accordion style folding until you reach the end of the paper.
- Pinch the folds together and punch a hole near the top edge. Do not punch the edge with the lace trim.
- Thread a 15 cm (6 in) piece of coloured string or cord through the hole, pull the folds tightly together and knot the cord.
- Spread out the folds to make a fan.
- Knot the ends of the cord to form a loop to hang the ornament.
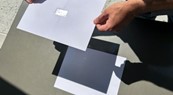
Making a Silhouette
 A silhouette is often a profile image of a person in black on a white background. It shows only the outline shape of a person's head and shoulders. These were quite popular in Victorian times. You can make a silhouette of yourself, a family member or friend.
You will need:
A photograph of your head and shoulders taken in profile (from the side)
Black construction paper
White card stock or other heavy white paper
Glue
Scissors
White coloured pencil or chalk
Frame for a 5 x7 photo
What to do:
Have someone take a photograph of you or the person you want to use
Enlarge and print the photo. The head should be at least 10cm or 4 inches high
Cut out carefully around the head and shoulders
Place the cut out on the black paper and trace around the cut out image
Cut out the black image
Glue the black silhouette to the white card stock
Frame your silhouette
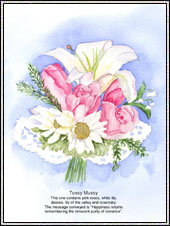
How to Make a Corsage
You need:
A small elastic band to hold the flower stems together
Ribbon
3 to 5 flowers (more if they are very small, odd numbers are best)
Straight pin
Scissors
Small container with water
What to do:
 1. Gather the flowers in your hand and arrange them until you are satisfied with how they look.
2. Place the elastic band around the stems just below the flower heads. You may need to wind it around several times to hold the stems firmly in place.
3. With scissors, trim the stems so they are an even length. A good guide is to make the stems about the same length as the height of the flowers.
4. Tie the stems together with the ribbon, covering the elastic band. Tie a pretty bow.
5. Place the pin in the ribbon on the opposite side of the bow.
6. Place the corsage in water until it is time to present it.
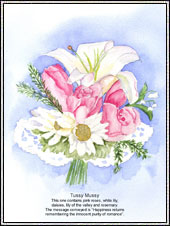
Another name for your creation:
In Victorian times these little bouquets were called TUSSY MUSSIES and were given to a young woman by the man who admired her. Each kind of flower had a special meaning.
Tic Tac Toe
This is a game children can easily make and play. Here�s what you need:
Materials:
1 8 inch square of green felt
4 2.5 inch squares of white felt
Fabric glue
Pinking shears (scissors)
Ruler
Pencil
10 buttons for markers (2 sets of 5) All buttons in a set of 5 should be the same.
To make:
Measure an 8 inch square piece of green felt
Cut with pinking shears
Measure 4 2.5 inch squares of white felt
Cut with pinking shears
Glue white squares to the green square in the pattern shown below.

To play:
Two players. Give each a set of 5 button markers. Take turns placing one marker on a square until one player completes a line, a column, or a diagonal.
Summer Fun in the Garden
Grow a fish in a bottle
If you still have some very small zucchinis growing in your garden you can try this.
You Need:
- A clear glass bottle with a narrow neck about 1 litre in size
- A paring knife
- A zucchini small enough to slip into the bottle
Directions:
- Very carefully, without breaking the zucchini off its stem, outline the shape of a fish on the long side of the zucchini.
- Carefully slip the zucchini, still attached to its stem, into the bottle. Support the bottle if necessary so the stem won't break.
- Watch the zucchini "fish" grow into a big "whale".
Your friends will wonder how the zucchini that large got into the bottle.
Alternative:
If you don't want to use a bottle, you can just cut a design on the zucchini and watch it grow.
Make a Corsage or "Tussy Mussy"
In Queen Victoria's era people loved their gardens and flowers. Almost every flower had a significant meaning so when a young girl received a bouquet from her beau she knew the hidden
message it conveyed. A small gift of flowers called a "tussy mussy" was quite common. You can make one for someone you love or make a smaller version as a corsage to wear on a lapel. Here's how.
You need:
- A few flowers from the garden or purchased from a store
- A small paper doily. (about 15cm for a tussy mussy or 8cm for a corsage)
- A small elastic band
- Coloured ribbon
- A straight pin for a corsage
 Putting it together:
Cut a small X in the middle of the doily, large enough to insert the flower stems.
Holding the flowers in your hand, arrange them into a pretty cluster.
Place an elastic band around the stems near the flower heads to hold the stems together.
Carefully push the flower stems through the hole in the doily and move the doily right under the flowers.
Trim the ends of the stems evenly about 15cm below the doily for the tussy mussy and 8cm for the corsage.
Tie the ribbon around the stems right under the doily, making a pretty bow and letting the ends of the ribbon hang down even with the bottom of the stems.
Putting it together:
Cut a small X in the middle of the doily, large enough to insert the flower stems.
Holding the flowers in your hand, arrange them into a pretty cluster.
Place an elastic band around the stems near the flower heads to hold the stems together.
Carefully push the flower stems through the hole in the doily and move the doily right under the flowers.
Trim the ends of the stems evenly about 15cm below the doily for the tussy mussy and 8cm for the corsage.
Tie the ribbon around the stems right under the doily, making a pretty bow and letting the ends of the ribbon hang down even with the bottom of the stems.
NOTE: The tussy mussy can be put in a vase of water to preserve it for several days. The corsage will likely wilt after it has been worn for several hours. You can also use artificial flowers if you want your creations to last indefinitely.
Make a Snowflake
In Victorian times handmade ornaments for the Christmas tree were popular. Simple materials were used � paper, feathers, dried flowers, pinecones, fruit, fabric scraps and more. It�s easy to make a snowflake to hang on the tree. Children will need help when using the oven. Here�s how to do it:
You need:
Parchment or wax paper
2 cups all purpose flour
1 cup salt
1 cup warm water
Mixing bowl
Wooden spoon
Rolling pin
Snowflake shaped cookie cutter
White craft paint
Drinking straw
Spatula
Baking sheet
Narrow ribbon
Directions:
- Cover your work surface with parchment or wax paper.
- Mix the flour and salt in a bowl and gradually add the warm water to make pliable dough. Turn dough onto work surface and knead until smooth.
- Roll out the dough to about � inch thickness.
- Use the cookie cutter to cut snowflake shapes.
- Use the straw to poke a hole for the ribbon hanger.
- Carefully transfer snowflakes with the spatula to a cookie sheet covered with parchment or wax paper.
- Bake at 300 degrees for 1 to 1/12 hours until dry and hard. Watch carefully so the snowflakes don�t brown or burn.
- Cool completely.
- Paint snowflakes white. Decorate with glitter if you like.
- Thread a ribbon through the hole. Knot the ribbon to make a hanging loop. Hang your snowflake on the tree.
Fly the Flag
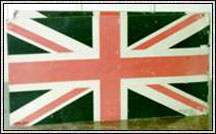
Until the end of World War I Canadian troops fought as part of the British armed forces. The flag they used was the British Union Jack. Even after Canada had its own independent armed forces it still flew the Union Jack since Canada had no flag of its own.
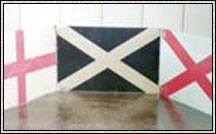
The first Union Jack was created in 1606 and combined the flags of two countries, the flags of England and Scotland. In 1801 the flag of Ireland was added. The flag design incorporated the symbols of the patron saints of the three countries: Saint George of England (red cross), Saint Andrew of Scotland (diagonal white cross on a blue background) and Saint Patrick of Ireland (diagonal red cross).
Take a close look at the photographs and try to create your own Union Jack.
Victorian Summer Games for Children
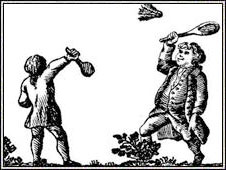 You don't need a net to play this early version of badminton. Get out the "battledores" (rackets) and the "shuttlecock" (birdie) and play a game of Battledore and Shuttlecock. The goal of the game is to keep the shuttlecock flying as long as possible. A point goes to the person who successfully makes the last hit. The player who can't keep the shuttlecock flying loses out.
The Christmas Cracker
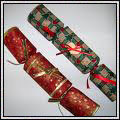 Christmas crackers were invented in 1847 and became part of Victorian Christmas tradition. Both Tom Smith and James Hovell of England claimed to have introduced the cracker. At first only candy and little slips of paper with messages called "kiss mottos" were wrapped in the cracker. Later, inspired by the sound of the crackling of a fire, a snapper was added. Tiny toys and paper hats were included too. The cracker was intended to remind one of a yule log.
How to Make a Christmas Cracker
You will need:
- 1 toilet tissue roll
- 1 snapper (from a craft store)
- Small candies, a printed trivia question or puzzle, and any other gift item small enough to fit into the tube.
- An 8" x 10" piece of crepe paper
- 2 pieces of 8" x 5" crepe paper
- Trimmings such as Christmas seals, glue on stars
- Glue
- Transparent tape
- Decorative string or ribbon
Centre the toilet tissue roll lengthwise along the 10" side of the 8 x 10" piece of crepe paper. Wrap the crepe paper around the roll. Secure it with 1 or 2 pieces of transparent tape.
Insert snapper and favours into the roll. The ends of the snapper should extend beyond the ends of the cracker.
Tie each end of cracker with string, making sure that the snapper is visible at each end of the cracker.
To make a fringe, take an 8 x 5" piece of crepe paper and fold in half lengthwise. Cut 1" deep slashes close together along the unfolded edges. Repeat with the second piece of 8 x 5" crepe paper.
Take about 12" of decorative string or ribbon and place it along the inside fold of the fringe. Gather and tie around the end of the cracker to cover the string. Repeat with the other end, using the second fringe.
Decorate with trimmings.
Great Summer Reading for Children
The long warm days of summer are great times to indulge in reading favourite books. Many adults recall wonderful times when they were young sitting under a tree, or in a tree house, or curled up in a chair by a window on a rainy afternoon devouring a good story, sometimes for the second or third time. One popular series of books was written by naturalist and early conservationist Thornton W. Burgess. His books are as popular today as when they were written between 1910 and 1960.
Burgess (1874-1965) was born on Cape Cod and was a direct descendant of Thomas Burgess, one of the original settlers in 1637 of Sandwich, Massachusetts. His lifelong interest in nature began when he worked as a young lad to help support his widowed mother. One of his employers lived on Discovery Hill Road, a wildlife habitat of woodlands and wetlands. When he began writing stories for magazines and a syndicated daily newspaper column, Bedtime Stories, he created tales of animals he remembered from his early days. Over his very productive career he wrote 15,000 syndicated stories and many books which have been published around the world in many languages.
The animals - Grandfather Frog, Chippy Chipmonk, Reddy Fox, Peter Rabbit, Jimmy Skunk and others of Mother Westwind's Children - live as real animals would. Though given human voices, the challenges they face are those of real animals in the forests and fields. Because some of their problems originate from human intervention, the stories contain important messages about preservation and conservation.
Here is a partial list of his books. They are available from Amazon.com.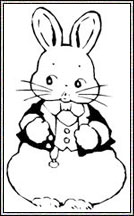 Mother West Wind's Children
The Adventures of Grandfather Frog
The Adventures of Paddy the Beaver
Mrs. Peter Rabbit
Old Granny Fox
Blacky the Crow
And many others ....
This picture of Peter Rabbit is from the Thornton W. Burgess Society website. Go to www.thorntonburgess.org for more information about Burgess, the museum, and a complete list of his books.
A Word Game
A game called Anagrams was popular with both adults and children. It's a good activity for a rainy day in the summer.
1. Cut about 50 small squares (2" x 2") of paper. On each piece of paper print a letter of the alphabet. (You can also use tiles from a Scrabble game.)
2. Place the pile of letters face down in the center of the table.
3. Each player in turn takes a square and turns it over. Continue turning over letters until a player calls out a word that can be made from the letters.
4. The player who sees the word takes the letters that make up the word and places them in front of him/her.
5. Continue turning over letters until another word is found. Letters can be added to a word already found to make a new word. For example, if the word bird is found by a player and later the letter "E" is turned over, a player can call out the word bride. When a new word is identified the player takes all letters in the word, "stealing" letters from the person who holds the letters in the previous word bird. The game ends when all letters have been turned over. The person holding the most letters wins the game. Players need to concentrate and be quick to recognize new words.
Word Squares! It's a Puzzle!
Before televisions and computers children found many ways to occupy their time. Though they did have many household responsibilities, there was still time for play. A variety of puzzles to solve kept them busy. Here is one for you to try.
This puzzle has 9 squares. One letter goes in each square. The trick is that the squares must read the same across and down. We have given you 3 letters to help you get started. Here are the clues.
 1. A furry friend
2. It's big _____ ___ house
3. A Scottish hat
Try to create your own puzzles to test your friends. There can be any number of squares as long as there are the same number across and down and the words are the same across and down.
A Pot of Potatoes
 Children can have fun growing their own vegetables. Tomatoes, zucchini and lettuce are good choices. Potatoes are fun to try. Here's how.
What you need:
- A large container like a half barrel.
- A piece of fine screening or landscape fabric
- Potting soil
- Compost or well aged manure
- A few seed potatoes
- A sunny spot that gets 6 hours of sun a day
 What you do:
1. Put the seed potatoes in a paper bag with an apple or a banana. Fold over the top to seal the bag.
2. After about a week check to see if the "eyes" of the potatoes have sprouted little shoots. If not, close the bag and wait another few days until you see green growth.
3. Remove the potatoes from the bag. Cut them into pieces with two or three sprouts in each piece.
4. Place your container in a sunny spot. Make sure there is a drainage hole in the container. Cut a piece of screening or landscape fabric to cover the bottom of the container to prevent the soil from washing out.
5. Put about 15cm (6in) of potting soil into the container. Add a shovel full of compost or well aged manure.
6. Poke holes in the soil and carefully place the pieces of potato in the soil. Cover with a little soil and pat gently. Plant when the temperature stays above 12C (55F).
7. Water gently. Test the soil every day by poking a finger to the depth of your second knuckle to make sure it has not dried out. Water gently when necessary to keep it moist. Don't overwater or the potatoes will rot.
8. A few days after planting you should begin to see some green shoots poking through the soil. When they are 10cm or 12cm (5 or 6 inches) long, make a little hill over each with more soil and compost. Leave 5cm (2in) of vine exposed. Repeat this process every time the vine is 10cm (5in) long.
9. Starry blooms will appear.
10. Late in the summer the vines will begin to wither and die. It's now harvest time. Tip the container on its side and carefully dump out the earth and potatoes. Spread the potatoes on newspaper to dry. Store the potatoes in a cool place but never in the refrigerator. Better still, cook and enjoy your harvest.
Make a Toy
A thaumatrope is an easy toy to make. Here's what you need.
- A piece of cardboard cut in a circle 3 inches (1.5 cm) in diameter
- Pencil, marking pens or crayons
- Scissors
- Two pieces of fairly heavy string, each about 6 inches (15cm) long
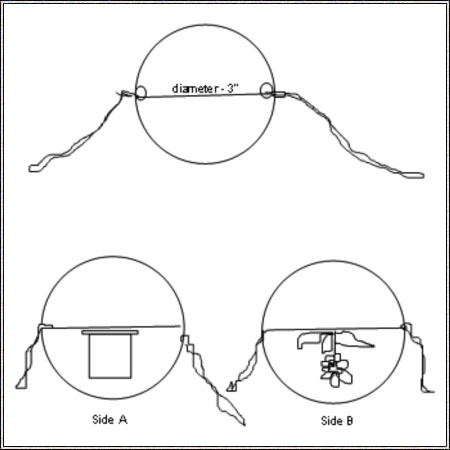
1) Punch one hole at each end of the diameter.
2) Attach one string through each hole.
3) Draw a light line across the circle between the two holes. This divides the circle in half. Draw a flower pot on the bottom half of the circle with the top of the pot just touching the line.
4) Turn the circle over and draw another faint line between the holes. Draw an upside down flower on the bottom half of the circle with the bottom of the flower just touching the line.
5) You can colour the pot and flower if you like.
6) Roll the strings between your fingers, thus causing the disk to spin rapidly. The two pictures will merge into one and the flower will be growing out of the pot.
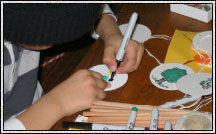
Make a Valentine for a Special Person

Valentines Day, named for St. Valentine, seems to have roots that go far back into pagan times when people celebrated the arrival of spring. This was a time of joy, renewal and love. In the 1700's in England and North America it became popular to give a hand made card as a love token to someone very special. By the mid 1800's greeting cards were being commercially produced and the valentine card, like the Christmas card, was sent (often anonymously) to ones friends. Hand made cards were still popular, especially among children. Commercially produced cards in the 1870's often used feathers, beads, and lace paper. Children could find these items easily around the house and create their own cards.
Here are directions for a simple valentine you can make for someone special in your life.
Materials needed:
- 1 sheet of 8.5" x 11" paper. Coloured paper works best.
- 1 paper doily, either a round one 3" in diameter or a rectangular one 3" x 4"
- Pictures of single flowers (3 or 5) either cut from a magazine or drawn by you. Flower heads should be about 1.5 inches in diameter. Roses and tulips work well.
- White glue
- Scissors
- Pen or pencil
Method:
 Fold the sheet of paper in half bringing the 8.5" wide bottom edge to meet the top. Fold in half again to make a card 5.5" x 4.25".
With the longer (5.5") folded edge on the left and the shorter (4.25") folded edges at the top, lay the card on the table.
Apply glue to the doily and carefully place it in the center of the front of the card. Press down to make sure it sticks well. Wipe away any excess glue.
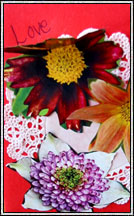
Carefully cut out each flower head.
Place the flowers on the doily, moving them around until you like the arrangement.
Put glue on only the bottom half of the flowers and paste them to the doily.
Under the top half of each flower print a hidden word like "love", "generosity", "luck" , "joy", "prosperity", "good health" ......
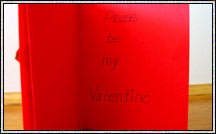 Open the card and on the inside carefully print a message to your Valentine. You could tell the person why you would like them to be your Valentine, what you appreciate about them, or just say "Please be My Valentine".
Victorian Parlour Games for Christmas
The Victorians loved parlour games. Here are two you can play during the holidays.
Lookabout
The person chosen as "host" shows everyone a small object taken from somewhere in the room. All the "guests" leave the room and the host then hides the object somewhere that is in full view. The guests then return and try to locate it. When they do they sit down. The last one to find it loses and is the next "host". Make it more challenging by milling about for a bit after finding the object before you sit down.
Alphabet Minute
Everyone writes a topic of conversation and a letter of the alphabet on a piece of paper. Put these in a basket or box. Any number can play at a time. Have one person pick topic from the basket. The person who picks must start a conversation on the topic. The sentence must begin with the letter on the slip of paper. The next person continues the conversation, starting his or her sentence with the next letter in the alphabet. Continue until you get through the alphabet to the letter you started on. Too make it more difficult you can allot a time limit.
For example: Topic selected is school. The letter is B
Person 1: Billy likes school.
Person 2: Can't do math, though
Person 3: Do you think he could get some help?
Person 4: Everyone else has trouble with fractions too.
Continue until you get back to B.
The Teacup Challenge
Here are some great ideas for putting those china teacups to good use.
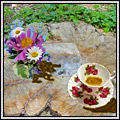
The Flower Arrangement
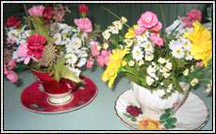 Put some floral foam (wet type for fresh flowers, dry type for dry flowers) in the bottom of the teacup. Insert flowers from your garden or dried or artificial flowers. Small blooms are best or you could use one large dramatic bloom. Place the teacup on the saucer and you have a pretty arrangement.
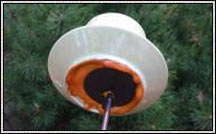
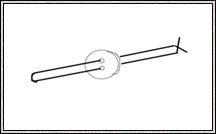
A Bird Feeder
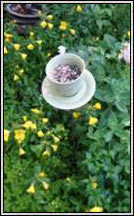 Attach a small flat piece of metal to a metal rod about 3 feet long. Your local hardware or building center store can help you with the pieces you need. With strong outdoor type glue, attach the cup to the saucer and the saucer to the flat piece of metal at the top of the rod. Insert the rod in the ground in your garden. Fill the teacup with either seeds or water. Watch the birds come to feed.
A Desk Aid
Put a pretty teacup on your desk and fill it with paper clips, elastic bands, or business cards.
A Pretty Measuring Cup
Count the number of spoonfuls of coffee grounds you use to make a full 12 cup pot. Put this same number of spoonfuls of grounds into a teacup. Keep testing until you find a teacup that when filled holds the right amount of coffee grounds. I have a small teacup which holds exactly the amount of coffee grounds I need for my 12 cup coffee maker. Alternatively, if the teacup you are using is old or has a hairline crack and can't be used for drinking you could put a tiny mark with an indelible pen at the level you need for the coffee. Just fill the teacup and then put the measured coffee grounds into the coffee filter. No more counting out the spoonfuls. Leave the teacup beside the coffee maker.
Garden in a Hat
Here is a fun project for children. Do you have an old hat, preferably a straw hat though any kind will do? Children can turn it into a mini garden. This time of year garden centers are selling off their annual plants so buy a few.
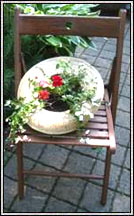 Impatiens, petunias, marigolds and alyssum work well. If the hat is very loosely woven line it with flattened coffee filters to keep the soil from washing out. Fill the hat with light container soil. Put in the plants. Water well.
If the soil you use does not have fertilizer already mixed in it you will need to fertilize your hat every couple of weeks. You can do the same with an old boot. Just be sure you won't ever want to wear the hat or boot again.
A Lavender Wand
Here is a fun craft for children if you have lavender in your garden. Pick an odd number of lavender stalks (13 or 15 works well) just before the buds are in full bloom. Tie the cluster of stalks just below the bottom blooms on the stalks. Holding the cluster gently upside down, carefully bend the stems down over the flowers making a basket of stems all around the blooms.
Tie the stems tightly with ribbon or yarn. If you wish you can thread narrow ribbon over and under the stems in a basket weave. Let the lavender wand dry thoroughly then wrap in tissue paper. Put in your sweater drawer to deter moths or just to enjoy the scent of lavender on your clothes.
Make Your Own Button Buzzer
You will need:
- 1 large button with two holes in it.
- 1 metre of thin but sturdy string
To make:
Thread the string through the holes in the button and knot the loose ends together.
To use:
 Make sure the button is in the middle of the string.
Place one end of the string in each hand.
Wind buzzer by swinging the button in circles until the strings are tightly twisted.
Pull both ends of the string away from the button and watch the button spin.
Put it close to your ear and hear it hum.
Make sure the button is in the middle of the string.
Place one end of the string in each hand.
Wind buzzer by swinging the button in circles until the strings are tightly twisted.
Pull both ends of the string away from the button and watch the button spin.
Put it close to your ear and hear it hum.
Increase and decrease the tension and watch and listen.
Move your hands in toward the button and then out until the strings are tight again.
Repeat over and over again. See how long you can keep it spinning and buzzing.
The Hectograph
What is a hectograph? It is the original version of a copying machine.
Several schools in Peel show supplies for hectographs in their inventories, especially in the 1930's and 1940's.
S.S. # 16 Toronto Township listed hectograph paper worth $2.60 and duplicating film worth $3.00 in its 1930's inventory book.
In 1937 trustees at S.S. #20 (Palestine) authorized the puchase of hectograph paper worth $4.50 and hectograph refill material
worth $2.00. The inventory for S.S. #21 W. Toronto Township (Victoria) listed 2 hectograph pencils (30 cents) and hectograph
paper (2.50). Recently on eBay 2 hectograph pencils were $1.80 and 10 sheets of hectograph paper were $10.
Hectograph stencils and the characteristic purple ink could be purchased from school supplies companies.
A hectograph was a home made duplicating pad of gelatine.
The following recipe works as well today as when it was first developed.
NOTE: Children will need an adult to help them with this project.
- 5 ounces French gelatine
- 32 ounces glycerine
- 10 tablespoons white sugar
- 1 pint cold water
- Soak gelatine in cold water.
- Add other ingredients
- Heat slowly to boiling point to prevent sticking.
- Boil 40 minutes.
- Pour into shallow cookie pan.
- Put on lid and cool.
- Wipe hectograph (gelatine mixture) with damp cloth.
- Make stencil with purple ink or buy stencil book.
- Place stencil face down on hectograph.
- Press gently with the back of a spoon or a roller.
- Leave for a minute or two to transfer ink from the stencil to the hectograph.
- Remove stencil. Ink will remain on hectograph.
- Place a sheet of white paper on hectograph.
- Carefully remove paper. Image will be transferred to the paper.
- Repeat with more sheets of paper. One inking will make up to 30 copies.
- Wash hectograph with warm water.
A Child's Garden
It's not too late to start a little vegetable garden in a container.
Radishes and lettuce are quick growers so get some seeds and get started.
Choose any container that is at least 30 cm (12 inches) in diameter and 30 cm (12 inches) deep.
Make sure there are holes punched in the bottom of the container.
Place a piece of landscape fabric, several coffee filters, or some stones on the bottom to keep the soil from washing out.
Fill the container with good potting mix. Plant the radish and lettuce seeds according to the directions on the package.
Water gently so you don't disturb the seeds. Keep the soil moist but not too wet.
Place in a sunny spot and in several weeks you should have a good crop.
The seedlings may need to be thinned if you have planted the seeds too close together.
Gently remove extra seedlings, trying not to disturb the surrounding plants.
When your lettuce and radishes are ready to pick you can have a tea party with dainty radish sandwiches.
If you have mint in your garden you can have mint tea.
Afternoon Tea
Radish Sandwiches
Pick several radishes from your garden.
Wash well and remove the stems and root.
Slice thinly.
Pick a lettuce leaf and wash it.
Butter two slices of bread.
You can use a cookie cutter to cut the bread into fancy shapes.
Put the sliced radishes on one piece of bread and place the lettuce leaf on top.
Top with the other piece of bread.
Sun Steeped Mint Tea
Pick a handful of mint stems.
Wash well.
Place in a 2 litre bottle or pitcher and cover with cold water.
Set outdoors in the hot sun for at least 12 hours.
Strain the tea and chill in the refrigerator.
Add a little sugar if you wish.
Enjoy your afternoon tea. Be sure to make several sandwiches if you have invited friends to join you.
Gardening for Children
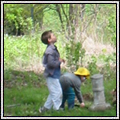 Early in the twentieth century schoolhouse gardens were part of the curriculum in Ontario schools. One of our Friends of the Schoolhouse members recalls planting and tending his garden in the 1920's where our wildflower garden is today. Today the Evergreen organization promotes the greening of schoolyards so that today's urban children can experience the fun of watching plants grow. The Evergreen website is www.evergreen.ca
You can introduce children to gardening by growing plants from kitchen waste. Tops cut from carrots will produce interesting house plants. Cut 2.5 cm (1 inch) from the top of the carrot. Set the cut end on a bed of perlite in a saucer. Add enough water to just reach the bottom of the carrot but not cover it completely. Watch the level of the water and add water as needed. Soon you will see leaves growing from the top of the carrot. Beets do very well this way and can be set directly in water without the perlite.
Cut the top from a fresh pineapple about 2.5 cm (1 inch) below the leaves. Scrape out the flesh and let the top dry for several days. Remove the bottom row of leaves and set the pineapple cut end down in a container of damp potting soil. Add soil to the level of the lower leaves. Cover the pot with a clear plastic bag and keep in a bright, warm spot but not in direct sun. Check to make sure the soil doesn't dry out. Add water as needed but don't over water. Remove the plastic bag when new leaves begin to appear. This means the cutting has rooted. If you have ideal conditions for your plant it may even produce a pineapple after a few years.
Sunflower seeds are easy to grow. There are shorter varieties that grow well in containers. Look for them at your local hardware store or gardening center. April is a great time to start plants indoors that can be moved outside after the last frost.
Sealer Ring Toss
In an era before supermarkets when home preserving of food was necessary there were lots of preserving jars and jar rings around to use for games. One was the sealer ring toss. You can make one and have fun with this game today.
Materials:
A large board
Cup hooks
Preserving jar rings
Method:
Put the cup hooks into the board at intervals large enough to leave room for the rings to hang freely.
Number each hook with a different number so that a score may be tallied. Any configuration can be used.
Playing the Game:
Establish a line on the floor. Stand behind the line.
Throw the ring to try to get it on the hook.
Two or more players can play.
Ideas for Scoring:
Highest score using three rings wins.
Person who gets a ring on every hook wins.
Marble Bridge
Age: 7 and up
Players: 2 or more
Place: Indoors or Outdoors
Equipment: 3 marbles for each player.
An arched bridge cut from shirt boards or heavy
cardboard, containing 9 or more holes.
Arches should be cut large enough for marbles to go
through. Each arch is numbered at random.
Chalk or stick for marking throwing line.
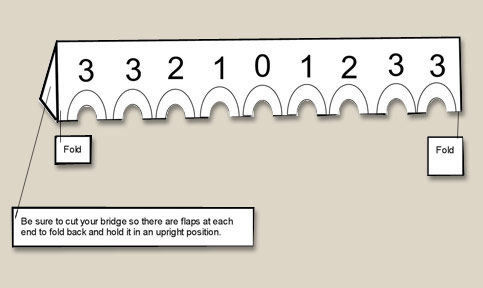
Rules: Players shoot from a marked line, a given distance from the bridge. Each player shoots all three of his marbles at each turn. A marble scores only if it passes all the way through an arch. The sum of the numbers of the arches through which a player is able to shoot the marbles is the player's score. The winner is the player who has the highest score at the end of the number of turns agreed to before the start of the game.
I Have a Basket
Players sit in a circle. Any number can play. The first person says, "I have a basket. What is inside?" The person beside him responds with an item beginning with the letter "A" and then repeats the question "What is in my basket?" The next person responds with something beginning with the letter "B". Continue around the circle with the letters of the alphabet until someone is unable to think of an item. The letter "Q" is especially tricky. If someone can't think of an item they drop out of the game. It may be necessary to go through the alphabet a number of times until only one person remains.
Anagrams
On small squares of paper, print the letters of the alphabet - one letter per square. You can also use the tiles from a Scrabble game if you have one. Place the letters face down on the table. Players take turns turning over one of the letters. If someone sees a word that can be made using the letters the person calls out the word, picks up the letters and places them face up in front of him or her. Players continue to turn over letters until another word can be made. Letters already picked up and placed in front of a player may be used to create the word. The player who calls out the word first gets all the letters. The object of the game is to get and keep as many letters as you can, so you must be quick to see a word. When all the letters have been turned over and no more words can be made, the player with the most letters wins the game.
Cudgels
This game was a favourite of boys. Two boys lie facing each other. Both are blindfolded. Each has a rolled up newspaper in his right hand and hangs onto the left hand of his partner. On a signal from the referee they attempt to land blows on each other. Since they are blindfolded a fair number of attempts miss the mark. This apparently caused great amusement among the onlookers who cheered on their favourite. At the end of an agreed upon time period the boy who landed the most wins. So much for non-violent games!
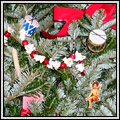
Popcorn Strings
 Materials Needed
Popcorn kernels (About � cup)
Needle
Heavy thread
Cranberries or small red wooden balls (optional)
Directions
1. Pop corn in a popcorn maker or saucepan. Put popped corn in a bowl and let stand for a day or two. If the popcorn is too fresh it will be hard to string.
2. Cut a piece of thread the length you want the finished Popcorn String to be. Thread the needle with the heavy thread. Poke the needle through a piece of popcorn and slide the popcorn along the thread. Continue until you have a popcorn string the length you want it. String the popcorn close together to hide the thread.
3. If you want added colour on your string thread a cranberry or little red wooden ball after every fifth or sixth piece of popcorn.
4. When you have the string the length you want it, tie a knot at the end to keep the popcorn from coming off.
5. Drape your popcorn string on the Christmas tree and enjoy.
Cornucopia
Materials neededA compass and pencil or a plate with an 11 or 12 inch diameter
Coloured construction paper at least 12 inches by 12 inches
Ribbon 8 inches long
Lace, paper doilies, rick rack, Christmas seals or other trimmings for decoration
Glue
Directions
1. Draw a circle on the construction paper using the compass and pencil or by tracing a plate.
2. Cut out the circle.
3. Fold the circle in half and then in half again to form 4 pie-shaped pieces.
4. Cut out each pie shape along the fold lines. You now have enough pieces for 4 cornucopias.
5. Overlap the straight edges and glue along the length of the edge to form a cone. You will need to hold the edges in place until the glue sets.
6. When the glue has dried, decorate the cone with bits of lace, paper doilies, seals and any other trimmings you like.
7. Punch a hole on either side of the cone near the top. Thread ribbon through the holes to create a hanger for the cornucopia. Knot the ribbon to secure it on each side.
8. You can fill the cornucopias with candies and hang them on the Christmas tree.
Paper Doily Ornament
Materials needed
2 small paper doilies
Picture cut from old Christmas or Valentine card
glue
ribbon
Directions:
1. Find a pretty picture on an old Christmas or Valentine card. Angels, Santa Claus, flowers, birds, children in old-fashioned dress are some possibilities. Cut out the picture. It will need to be the right size to fit in the centre of the doily.
2. Glue the picture in the centre of the doily.
3. Form a loop with a length of ribbon long enough to be a hanger for your ornament.
4. Glue the bottom part of the ribbon to the back of the doily, leaving enough of the loop at the top for hanging.
5. Glue the second doily to the back of the first one to cover the ends of the ribbon.
6. Hang your ornament on the tree.
Lemon Treats for Summer
In past summers we have invited Friends of the Schoolhouse members and friends to have lemonade and cookies on the schoolhouse lawn. COVID had cancelled this for the past two years and again this year. Here are two recipes you can make to enjoy on your own lawn, patio or balcony.
Lemon Bars
This is a favourite on the cookie tray
Ingredients
FOR THE CRUST
2 c.
flour
1/2 c.
sugar
1/4 tsp.
salt
2
sticks (1 cup) salted butter, cut into small cubes
FOR THE FILLING
1 1/2 c.
sugar
1/4 c.
sugar
flour
4
whole large eggs
Zest and juice of 4 medium-sized lemons
Powdered sugar, for sifting
Directions
- For the crust: Preheat the oven to 350°. Grease a 9-by-13-inch pan with butter. (Use an 8 x 10 pan if you'd like the layers to be a little thicker.)
- Stir together the flour, sugar, and salt. Add the butter to the bowl and use a pastry cutter to cut it all together until the mixture resembles fine crumbs. Press into the prepared pan and bake until golden around the edges, about 20 minutes.
- For the filling: Stir together the sugar and flour. Crack in the eggs and whisk to combine. Add the lemon zest and juice and mix until combined. Pour over the crust and bake about 20 minutes.
- Allow to cool in the fridge for a minimum of 2 hours, then sift powdered sugar over the top before cutting into squares.
Lemonade Ice Tea
(Sometimes known as an Arnold Palmer)
- Bring 1 litre of water to a boil.
- Pour boiling water over two regular tea bags and one Earl Grey tea bag in a large tea pot.
- Steep for ten minutes or longer. You can even leave it until it is cool.
- Put half a can of frozen lemonade in a serving pitcher. You can add it frozen. No need to thaw.
- Pour tea over the lemonade and stir.
- Refrigerate until cold.
- Pour a glass and enjoy.
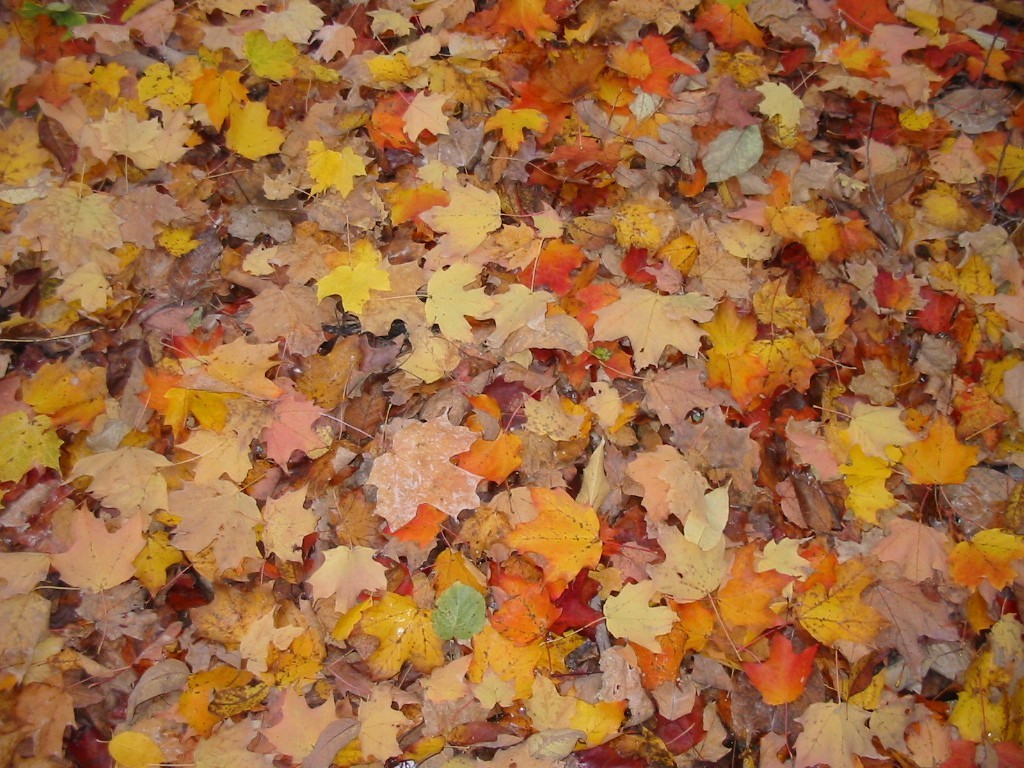
Save Those Colourful Leaves
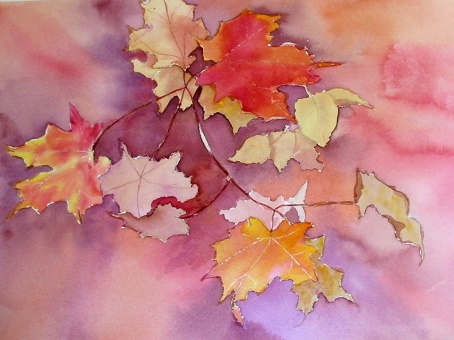
The old-fashioned way of preserving leaves was to press them between the pages of a heavy book. Sometimes people would forget they had done this and years later, when someone was sorting through the books, a dried leaf would fall out of the pages. Today there is a much better way to do this, though perhaps not as quick as inserting a leaf in a book.
You will need:
- Fresh leaves with interesting colours
- Wax paper
- A sheet of heavy paper
- An iron and ironing board
- A towel
- Scissors
What to do:
- Cut two sheets of wax paper larger than the leaf
- Place the sheet of heavy paper on the ironing board
- Place one sheet of wax paper on the heavy paper
- Put the leaf on the wax paper and put the second sheet of wax paper on top
- Cover the wax psper with the towel
- With the iron on low heat, firmly press the leaf. The heat will transfer the wax to the leaf to preserve it.
- Let cool. Remove the towel.
- Carefully cut around the leaf leaving a small margin to ensure a good seal.
Your leaf is now preserved with a coating of wax.